
How to clean a split system air conditioner
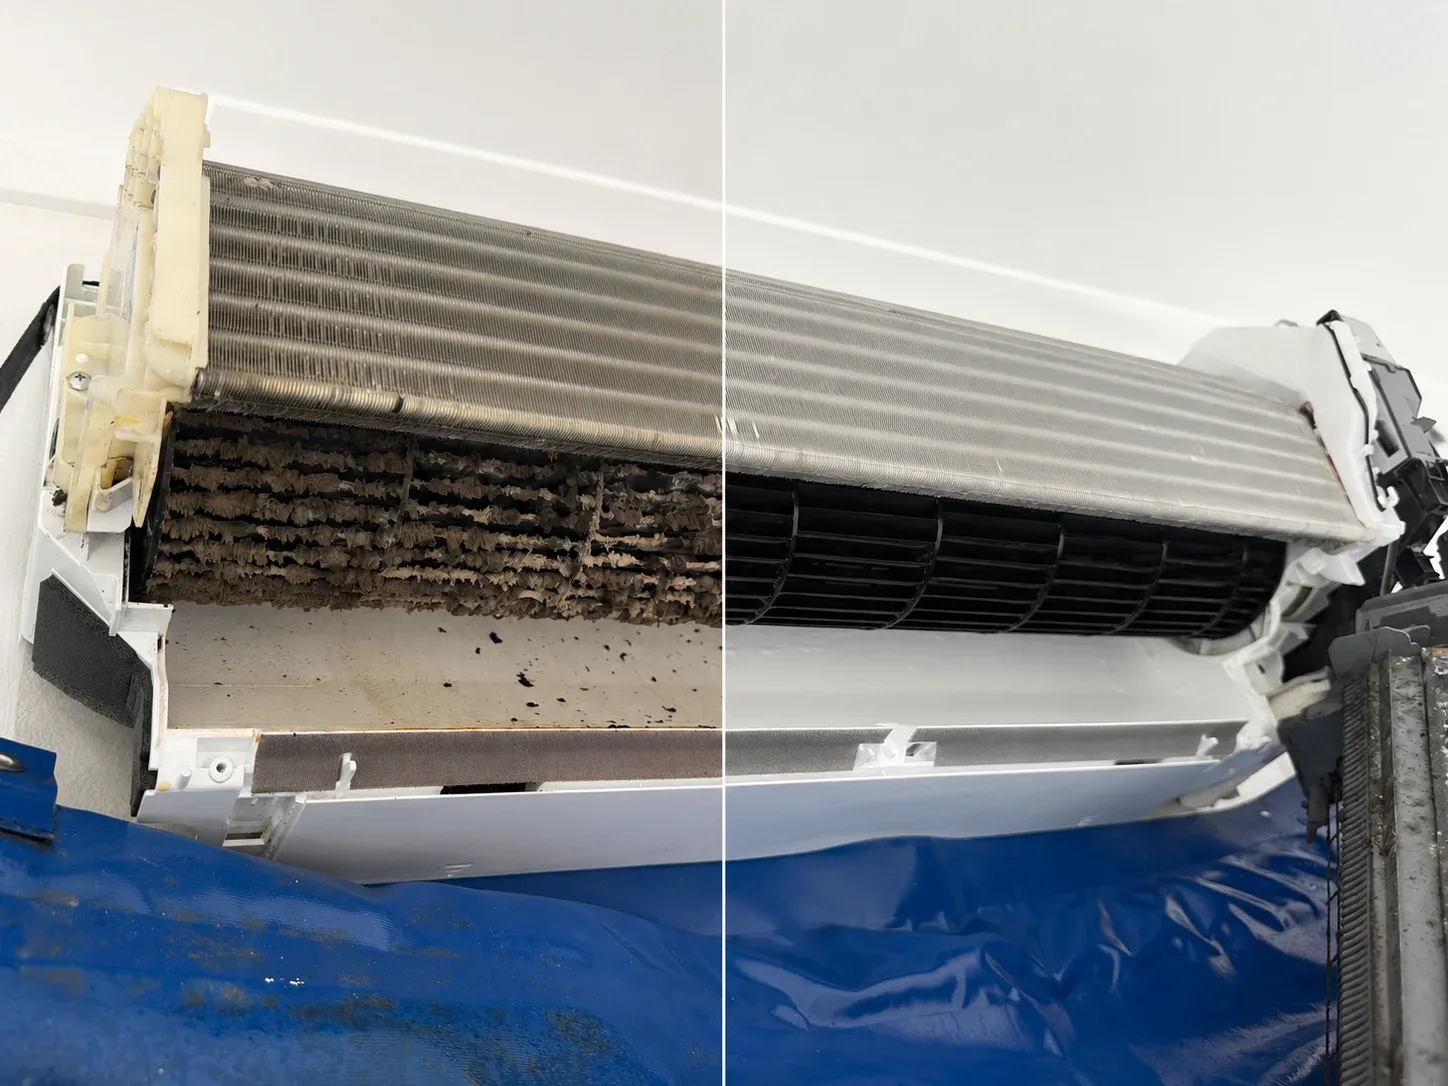
This is the maintenance clean you can do yourself, properly and safely, in about twenty minutes. It covers the filters, the surfaces you can reach and the outdoor unit. It stops short of taking the unit apart, and the last two sections explain exactly why that line is where it is.
Isolate the power at the isolator switch or circuit breaker, not just at the remote. A unit switched off at the remote is still live, and the fan can start on a timer or a scheduled function while your hands are inside it. If you are not confident locating or operating your isolator or switchboard, do not proceed with this guide.
What you’ll need
Nothing on that list is specialised, and nothing on it is a chemical coil cleaner. There’s a reason for that, covered further down.
Step 1: Isolate the power
Find the isolator switch, usually a small box on the wall near the indoor or outdoor unit, and switch it off. If there isn’t one, turn off the relevant circuit at the switchboard. Confirm the unit is dead by trying the remote. If you cannot identify the isolator or the correct circuit with confidence, stop here and have the clean done professionally.
Step 2: Open the front cover
The hinged front panel lifts up and forward. On most units there are small catches at either end. It should open with light pressure, so if it feels like it needs force, look again for a catch rather than pulling harder. Lay the towel on the floor beneath before you start.
Step 3: Remove and wash the filters
The filters lift up slightly to release, then slide out towards you. Take a photo before you remove them if you’re unsure how they seat, since they only go back one way.
Brush the loose dust off first, outside if you can. Then rinse them under warm running water, working the brush gently from the clean side outwards so you’re pushing dust out of the mesh rather than through it. Rinse until the water runs clear. Warm water and a brush handle ordinary filter dust perfectly well. If you’d rather use a product, use a cleaning solution suitable and intended for HVAC use, applied as directed on the label, and check your manufacturer’s manual first.
Leave them somewhere shaded to dry completely. Not in direct sun, which can distort the plastic frame, and not near a heater. This usually takes a couple of hours, so do this step first and let them dry while you carry on.
Step 4: Brush away the accessible dust
With the filters out, use a soft brush to lift loose dust from the filter channels and the front face of the coil. Work with the direction of the fins, vertically, never across them.
Keep the pressure light. The fins are thin aluminium and bend permanently if you press or poke between them, and bent fins restrict airflow for the life of the unit. If dust is packed in rather than sitting loose, stop. That’s a coil clean, not a brush down.
Step 5: Wipe the casing and louvres
Dampen a cloth with warm water, wring it out well so it isn’t dripping, and wipe the outer casing, the front panel and the louvre blades. The louvres are where visible growth usually shows first, so pay attention to their edges.
Move the louvres gently by hand to reach both faces. They’re driven by a small motor and will snap if forced, so if one doesn’t want to move, leave it. Dry everything with the second cloth.
Step 6: Check the drain outlet
Outside, find where the condensate drain line exits, usually a small pipe running down the wall near the outdoor unit or discharging into a garden bed. Check the end isn’t blocked with debris, insects or a build-up of grime, and clear anything obvious away from the opening.
Don’t push wire or anything rigid up the line. It’s easy to puncture or dislodge, and a damaged drain line becomes a leak inside the wall. If the line is blocked further in, that needs flushing properly, which is part of a professional service. See air conditioner leaking water.
Step 7: Refit and run in fan mode
Only once the filters are completely dry, slide them back in, seat them properly and close the front cover until the catches click. A damp filter going back into a unit puts moisture exactly where you’re trying to avoid it.
Restore power and run the system in fan mode for fifteen to twenty minutes, not cooling. That dries out anything still damp inside and confirms the fan and louvres are working normally before you need it.
Step 8: Clear the outdoor unit
With the power still isolated, clear leaves, grass clippings, cobwebs and garden debris from around and on top of the outdoor unit. Brush loose material off the coil fins on the outside faces with the same soft brush, again working with the fin direction and keeping the pressure light.
Keep plants and stored items at least half a metre clear on all sides. The outdoor unit rejects heat by moving a lot of air, and anything blocking that makes the whole system work harder. Don’t remove its casing or hose water into it.
Done all this and it still smells?
Then the cause is on the coil, the barrel fan or in the drain pan, and those need the unit opened up. Fixed price, quoted before we start.
What not to do
Don’t spray water into an assembled unit
The control board sits at one end of the indoor unit behind the casing, close to the coil. Water introduced from the front has no controlled path out and can reach it. This is the most expensive DIY mistake we get called to, and it turns a cleaning job into a board replacement.
Don’t use aerosol coil cleaners blind
Those cans work by foaming into the coil and draining out through the condensate line. If the drain is already partly restricted, which it usually is in a unit that needed cleaning, the residue and everything it loosened has nowhere to go but the pan and then your wall. They also don’t reach the barrel fan, which is normally where the smell originates.
Don’t use bleach or strong household chemicals
Bleach corrodes aluminium fins and the metal components around them, and residue left inside a unit ends up in the airflow. Warm water, or a solution intended for HVAC use, is the right choice for the surfaces you can reach.
Don’t dismantle the unit
That part of the job is a professional split system clean. Removing the casing to get at the barrel fan means working around live electrical components, the drain pan and the refrigerant lines, without containment for the run-off. It also may affect your warranty. Check your handbook before you consider it.
Where DIY stops, and the honest reason
The steps above cover everything you can reach safely with the casing on. Behind it sit the components that actually hold contamination: the back face and depth of the coil, the full circumference of the barrel fan, and the drain pan and line. Cleaning those needs the unit partly dismantled, a catch bag to contain the run-off, and the drain flushed afterwards.
That isn’t a sales line, it’s just where the physical access ends. Why cleaning your air conditioner filter isn’t enough explains the layout, and what’s included in a professional clean shows what happens once the casing is off.
How often to repeat this
Filters every two to four weeks while the system is in use. The full routine above at the start of each cooling season, and again mid-season if you’re somewhere dusty. Full intervals by system type are in how often should you clean your air conditioner, and the habits that keep it fresh between cleans are in how to prevent mould in your air conditioner.
Common questions
What can I use to clean my split system?
Warm water, a soft brush and microfibre cloths handle everything you can safely reach yourself. If you’d prefer to use a product, choose a cleaning solution suitable and intended for HVAC use and follow the label directions, and check your manufacturer’s manual first since materials vary between brands.
Can I use vinegar or bleach?
Neither is a good idea inside an air conditioner. Both can corrode aluminium fins and surrounding metal, and residue left in the unit ends up in the air being blown into the room. Mild soapy water is safer and works just as well on accessible surfaces.
Do I really need to turn the power off at the switchboard?
Yes. Off at the remote is not off. Units can start on timers or scheduled functions, and a barrel fan starting with your hand near it is how people get hurt. Use the isolator if there is one, otherwise the breaker.
How long do the filters take to dry?
Usually a couple of hours in shade with some air movement. Don’t rush it with a heater or direct sun, and don’t refit them damp. Wash them first thing so they’re drying while you do the rest.
Is it safe to clean the outdoor unit myself?
Clearing debris from around it and brushing loose material off the outside of the coil is fine, with the power isolated. Don’t remove its casing, don’t hose water into it, and don’t touch the fan or any wiring inside.
Can I clean the barrel fan myself if I’m careful?
We’d advise against it. Reaching it means removing the casing, working near live components and the drain pan, with no containment for the run-off, and build-up on the blades doesn’t come off without a proper wash. It’s the part of the job worth paying for.
This article is general information, not advice for your specific system. Every make and model differs, so check your manufacturer’s handbook before carrying out any maintenance yourself. If you are not confident at any point, stop and have the work done professionally. Spotless Clean Air Services accepts no responsibility for damage or injury arising from work carried out by the reader.
Spotless Clean Air Services holds a Certificate II in Air Conditioning Hygiene accreditation. This guide is written so you can do the maintenance half properly, including the parts we’d rather you didn’t attempt.